
TUTORIAL 01 / IMPORT / 4 MIN
Import a CSV and map its columns
Prepare a small file, check the suggested mapping, and give the import a recognizable list name.
Download the fictional sample CSV ↓Actual AppendIQ screens, fictional clients and records. Screenshots use local simulated responses. No live provider results, customer data, or charges.
- 01
Prepare one record per row
Use a header row with clear column names. Our downloadable sample has six fictional contacts, example.com email addresses, and reserved 202-555-01xx phone numbers. One email and one state are intentionally blank so you can practice spotting gaps. Keep an untouched copy of your original file.
- 02
Open Upload CSV and review the preview
Choose Upload CSV in the sidebar, then drop a CSV into the upload area or browse for it. Check the filename and detected row count. The mapping screen shows the first five rows; it does not display the entire file.
- 03
Map fields and name the list
Check every suggested destination. Map full_name to Full Name, business_name to Business Name, email to Email Address, state to State, and phone_number to Phone Number. Use Skip for columns you do not want to import. Enter a list name such as “Northstar Demo • training” so you can recognize the records later.
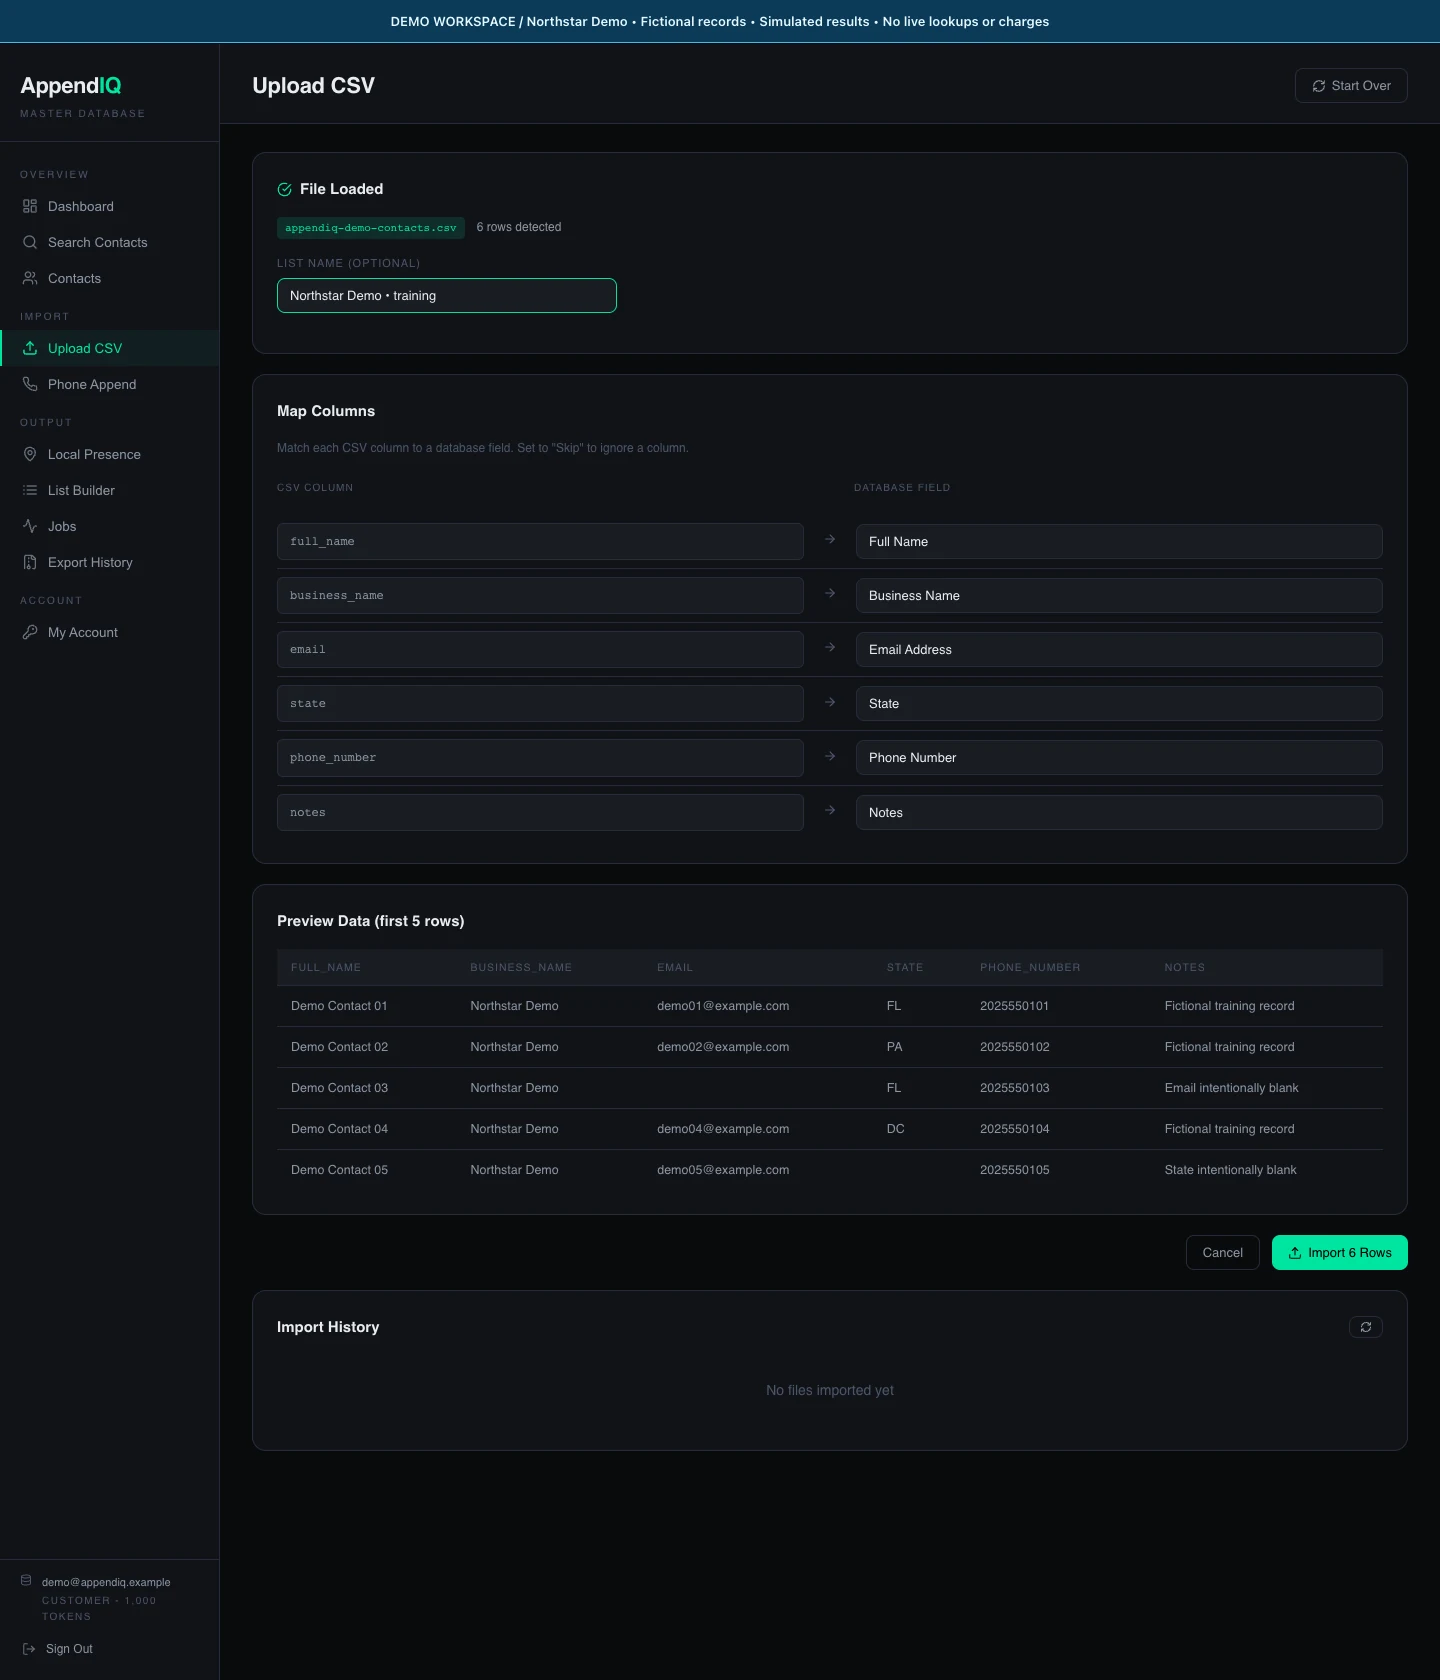
Demo mapping: the CSV header is on the left; its destination field is on the right.Open full size ↗ - 04
Import, then check the outcome
Choose Import 6 Rows for this sample. Wait for Import Complete and compare imported and skipped counts with your input. The walkthrough uses simulated responses; a real file may finish with different counts or an error. Move to the next tutorial before choosing any paid processing action.